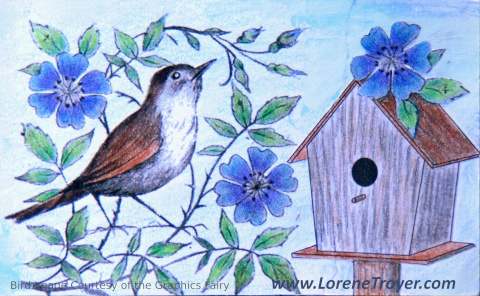
How to Use Clip Art in Your Mixed Media Art
Since I create art to sell, I’m always on the lookout for images that are copyright-free. While I prefer to use photos, I recently started downloading some illustrations from the Graphic Fairy website and also bought a Dover book filled with flower designs and illustrations. Here are some of the steps I took and things I learned about using clip art in my mixed media collages.
Since the Dover Clip art was in a book, I first I scanned the images I wanted to use, setting the resolution to 300 dpi. Then I opened it up in Gimp (a photo editing program) and played with the contrast settings until I was happy with the way the image it looked. Then, with the lasso tool, I cut out the parts of the image I wanted and saved them as a jpg.
Then I opened the images up in OpenOffice Draw, resized them to fit on my art card and printed them out onto white printer paper. Then I colored the images using colored pencils and acrylic paint. Next I tore them out and adhered them to my art card. I painted in some details- things like grass, little flowers, a tree, clouds etc.
Here are some of the things I learned about using clip art in your mixed media collage:
One way to make the clip art (that’s been colored with pencils) and your photos blend together is to apply a thin layer of clear gesso or certain types of matte medium onto your glossy images and when dry, you can add texture and shading to them with the colored pencils to give it a similar texture as the clip art.
When printing out clip art that has details such as flowers, leaves, bugs etc. print out extras so you can cut out some to fill in spaces later.
To use the clip art in my collage, I normally either fussy cut before I paste into my art or paint around the details after it’s glued down but when the clip art has a lot of details this can be challenging. Here are some thoughts on how to work around that.
Print your image out on colored paper with a faux texture that coordinates with the finished look you want. This will make it less obvious if you color in the wrong spaces.
If some of the little details get cut off (twigs, grass, leaves etc.) you can draw them in later. This has the added benefit of helping your piece be more cohesive.
You can use a craft knife to cut out small areas.
Instead of painting around all the details, try using colored pencils to add light layers of color to the background. Mistakes can be erased or covered up.
A final tip, when your piece is done, you can cover it with a layer of glossy medium. This will not only protect it but will make the colors look more vibrant and help give your piece a cohesive feel.
