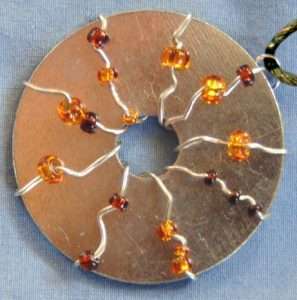
Making your own jewelry is a fun way to express and display your creativity. This tutorial combines two popular DIY ideas in jewelry making- the washer necklace and wire jewelry.
You’ll need:
-about 16 inches of 24 or 26 gauge silver wire
-small beads (I like to use 2 or 3 different sizes in the same color family)
-1½ inch fender washer
-chain necklace or soft cord and clasp, desired length (clasp is optional)
needle-nose pliers
-superglue
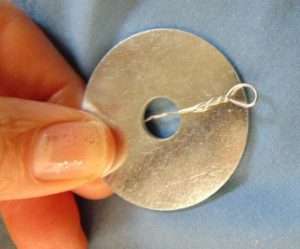
Fold the wire about 1½ inches from the end and twist securely to form a loop (big enough for your cord or chain to fit through). Position the wire behind the washer so that the loop is showing. Hold the wire in place and wrap it firmly around the washer.
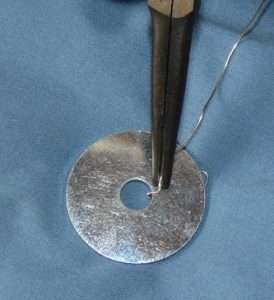
Using the pliers, put a kink in the wire in front of the washer near the bottom and put one of your beads on. After you’ve put one bead on, make another kink and put on another bead on the wire. Wrap the wire securely around the washer.
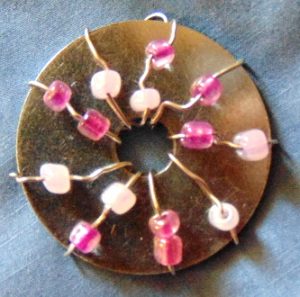
Leave about ¼ inch space from the beaded wire and repeat the same process as before- make a kink and place a bead. You can put one, two or three beads on the wire, kinking the wire between each bead. 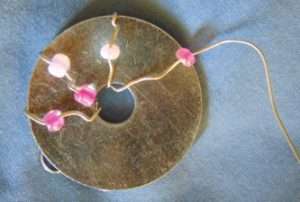
Repeat this process until you’ve gone around the whole washer.
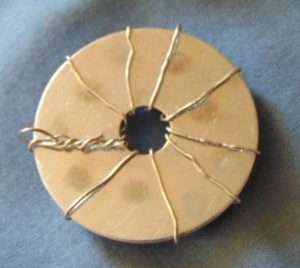
Then, on the back of the washer, hold the wire in place and secure it by placing the end under the first wire (the one with a loop) and wrap around it 1 or 2 times. Trim off the extra and make sure no sharp ends are sticking out. Add a drop of glue to help hold it in place and cover any sharp wire.
Finish by threading your cord or necklace through the loop. If you are using a cord, you can either knot the ends together or apply a clasp.
After you make your first piece, try experimenting with different sizes and colors of beads. You can also experiment with different wires, creating shapes and interesting designs. You may even decide it looks better without the beads.
To watch as a video tutorial.
